



How a refrigerant pressure gauge works
 Sep 03, 2026|
 View:395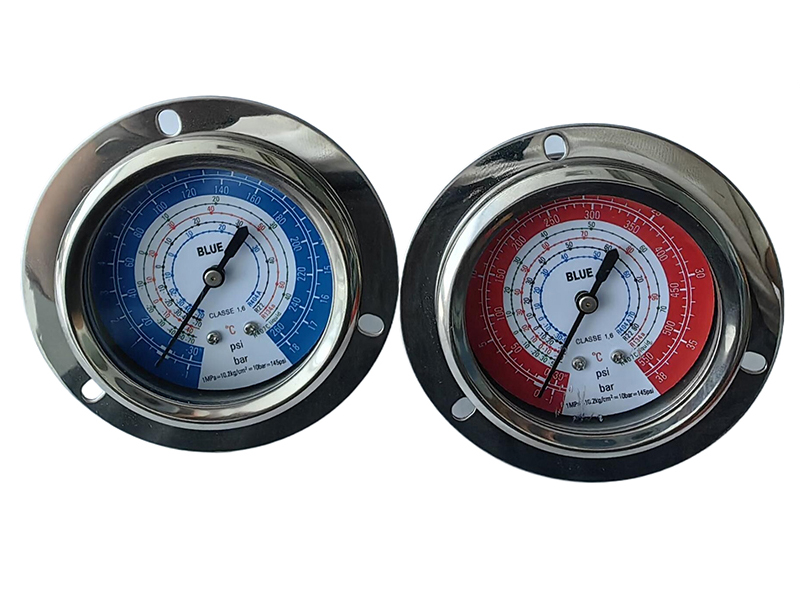
Technicians rely on this reading to judge system performance. You check if levels are too high or too low, which affects cooling efficiency and equipment safety. An hvac pressure gauge gives you the data you need to make smart choices.
The following sections explain what a refrigerant pressure gauge is, how its inner mechanism works, the role of high-side and low-side gauges, and the key features that ensure reliable readings in the field.
Key Takeaways
A refrigerant pressure gauge works with a Bourdon tube to measure pressure and move a needle.
The blue low-side gauge shows suction pressure and helps find problems with low refrigerant or airflow.
The red high-side gauge shows discharge pressure. It helps find problems with heat rejection or too much refrigerant.
Glycerine filling cuts down on needle shaking and makes the readings easier to read.
Always compare pressure readings with temperature to find system problems accurately.
What Is a Refrigerant Pressure Gauge?
Core Components and Purpose
A refrigerant pressure gauge is a tool that shows pressure as a number you can read on a dial. You use it to see how well a cooling system works. The main sensing part is the Bourdon tube. This curved metal tube bends when refrigerant flows into it. That movement then pushes a needle across a marked scale.
The Bourdon tube works by a simple mechanical action. A C-shaped or spiral tube has an oval cross section. When pressurized fluid enters, the inside pressure pushes that oval shape toward a round shape. This change forces the tube to move. A C-shape tends to open up, while a spiral tends to stretch out. The closed end connects to a mechanical linkage. That movement drives the pointer needle. You read the needle's position on a scale marked for pressure. The tube material matters for how long it lasts. Copper-alloy tubes work well for HCFC and HFC refrigerants. Stainless steel 316L is required for CO2 systems.
Copper-alloy (brass) Bourdon tubes are standard for HCFC/HFC refrigerants and acceptable for low-pressure CO2. Stainless steel 316L is mandatory for CO2 systems and preferred where cross-contamination from compressor oils or desiccant particles is possible.
Role in Manifold Gauge Sets
A refrigerant gauge set puts two gauges on one manifold body. This setup lets you read both sides of the system at the same time. Color coding keeps things easy in the field.
The right (red) side of the manifold is the high side and the red gauge is the high pressure gauge. The left (blue) side of the manifold is the low side and the blue gauge is the vacuum/pressure gauge.
You can find common problems by watching these gauges. A slow pressure drop over time points to a leak. Large needle movement can mean a restriction. However, a manifold gauge only confirms a problem you already suspect. You need electronic leak detectors or soap bubbles to find a leak exactly.
System Issue | How Manifold Gauge Sets Help Diagnose | Limitations / Notes |
|---|---|---|
Leaks | A slow pressure drop seen over time on the gauge readings can suggest a leak in the refrigerant system. | Manifold gauges are not a main leak detection tool; they only help confirm a suspected leak. Finding the exact spot requires electronic leak detectors, UV dyes, or soap bubbles. |
Restrictions | Large and steady gauge needle movement (on analog gauges) can mean a partly blocked line, along with other causes like compressor cycling or vibration. | The cause must be checked by watching system stability and looking for too much vibration before you decide a restriction exists. |
How the Internal Mechanism Works
Bourdon Tube Action
The Bourdon tube is the main part inside every analog refrigerant pressure gauge. This bent metal tube has an oval-shaped cross-section. It changes shape when the pressure inside it changes. You can think of it like a spring that bends when pressure pushes on it.
Here is the physical order that makes the tube move:
The Bourdon tube is a bent metal tube with an oval cross-section that changes shape when the pressure inside it changes.
As the pressure of the medium goes up, the cross-sectional area of the tube changes, which makes the tube bend.
This bending happens because the tube wall material stretches elastically under internal pressure.
The tube acts like a spring that internal pressure bends. Because the tube is curved, its outer radius is bigger than its inner radius. Internal pressure pushes on a larger surface area along the outer radius. This creates a greater force on that side, which makes the tube straighten out.
The curve of the tube also affects how sensitive it is to pressure changes. The shape, including the curvature radius, strongly affects how well it responds and how sensitive it is. Making the curvature radius better boosts the mechanical advantage. This makes pressure measurement more sensitive. A larger curvature radius can cause greater tip deflection for each unit of pressure.
The Wuest relation for a Bourdon C-tube shows that tip deflection is proportional to the square of the mean radius of curvature. So, increasing the curvature radius directly increases the deflection for a given pressure, which means higher sensitivity.
Pressure-to-Needle Movement
The tube's tip moves only a tiny amount. The tip deflects linearly by 3 to 8 mm under pressure. That small motion must become a full pointer sweep across the dial. A linkage mechanism does this job.
The Bourdon tube tip deflects linearly (3-8 mm) under pressure, connecting through an adjustable link that passes this motion to a sector gear.
The sector gear meshes with a pinion on the pointer shaft, giving a gear ratio of 8:1 to 12:1 to amplify the small tip movement into a pointer sweep of about 270°.
A hairspring on the pointer shaft loads the gear mesh in one direction, removing backlash and stopping jitter or hysteresis (differences between rising and falling pressure readings).
Link length adjustment calibrates span: shortening the link increases pointer sweep per unit pressure, while pivot clearance must be under 0.05 mm to avoid hysteresis.
The sector gear and pinion turn the linear motion from the Bourdon tube's tip into rotational movement of the pointer. They provide mechanical amplification with a gear ratio usually between 8:1 and 12:1. Backlash in the gear teeth directly causes a dead-band in the pointer. High-quality gauges use lapped brass sectors and hardened steel pinions to reduce this effect.
Because these mechanical parts can wear and drift over time, calibration is needed. You manually adjust the internal mechanism and check the dial reading against a known reference standard. This makes sure the pointer position correctly matches the actual pressure. Calibrating the dial is essential for reliable pressure readings in a refrigerant pressure gauge.
How High-Side and Low-Side Gauges Work
A manifold gauge set separates system pressure into two readings. Each side explains a different part of the story. You read both together to check system health.
Low-Side Gauge (Suction Pressure)
The low-side gauge (blue) hooks up to the suction line between the evaporator and the compressor. It measures refrigerant pressure as it enters the evaporator. This reading tells you the boiling temperature of the refrigerant inside the coil.
Low suction pressure can mean several problems. The evaporator may not get enough refrigerant, or airflow may be blocked. A broken metering device or a clogged filter drier can also cause this drop. You cannot figure out the issue from pressure alone. You must compare it with superheat. Low suction pressure with low superheat may mean flooding or a bad TXV. Low suction pressure with high superheat usually points to a starved evaporator coil.
Suction pressure shows the boiling temperature of refrigerant in the evaporator. If suction pressure drops below a 32°F saturation temperature, the evaporator coil will freeze over time. As a general rule, suction pressure should be about 35°F saturation below indoor ambient, plus or minus 5°F, measured at the return at the evaporator coil.
You can also find an undercharge with this low-refrigerant pressure gauge. Compare your reading to expected values for the ambient temperature. At 80°F, for example, the low side should read 40–50 PSI. A reading below that range confirms a low refrigerant level and a possible leak.
High-Side Gauge (Discharge Pressure)
The high-side gauge (red) hooks up to the discharge line between the compressor and the condenser. It measures refrigerant pressure as it leaves the compressor. This reading shows the condensing temperature.
Typical high-side pressure ranges change with conditions. On a warm day, you will see 370–420 PSI. Under normal cooling conditions, the range is 300–450 PSI. In cooling mode discharge, it runs 400–450 PSI.
A high-refrigerant pressure gauge reveals problems with heat rejection. When condenser coils get dirty, they cannot release heat well. This traps heat in the system, and the discharge pressure rises. A high-refrigerant pressure gauge reading above the expected range for the ambient temperature signals an overcharge. For example, a low side of 36 to 43 psi combined with a high side of 327+ psi means both pressures are too high. You should recover excess refrigerant and charge to the correct level.
These gauges work as a team. The low side shows how well the evaporator absorbs heat. The high side shows how well the condenser releases it. Together, they give you a complete picture of system performance.
Key Features That Affect Performance
Case Materials, Accuracy, and Filling
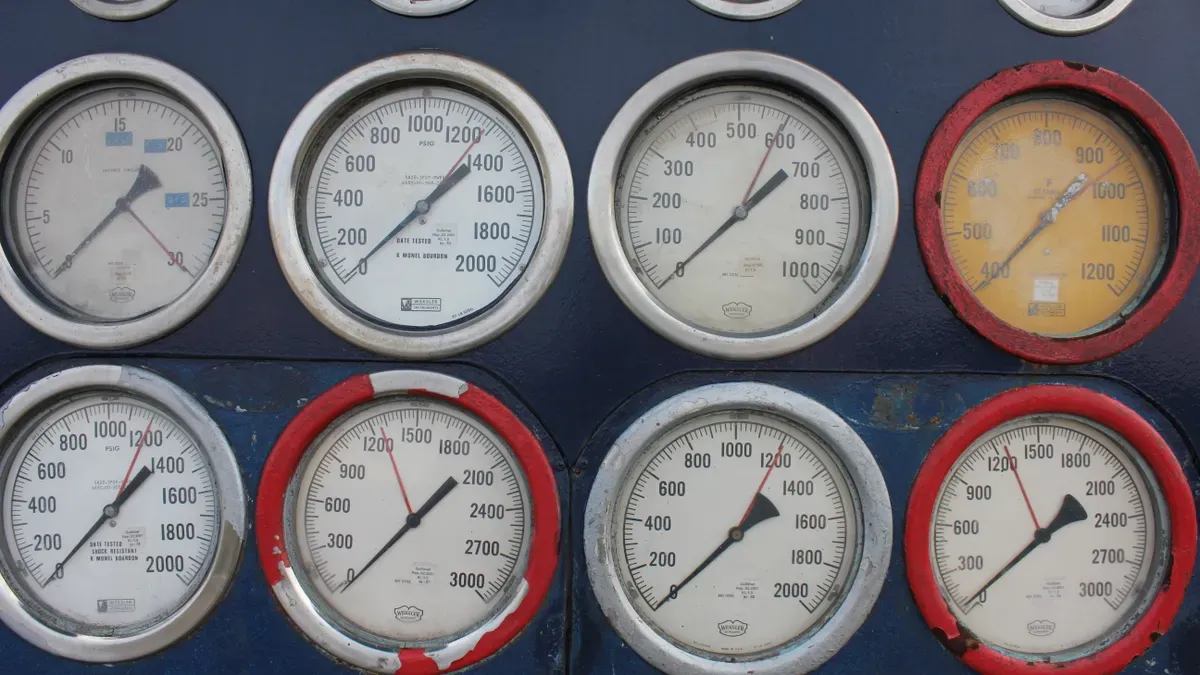
The case keeps the inside parts safe from wetness, dirt, and bumps. Changzhou KB Instruments makes the PG-09 with a stainless steel case option that fights rust. You can pick plastic or steel too, based on your budget and where you work. Stainless steel works well for chemical plants, boats, and other places that cause rust. A shiny 304 stainless steel case stands up to harsh materials and air, while 316 stainless steel wetted parts give even more protection.
Glycerine filling changes how the gauge acts out in the field. The fluid slows down the needle, so shaking and pressure spikes do not make your reading blurry. It also greases the bearing and gear spots where parts rub, which makes the inside parts last longer. A glycerine-filled gauge handles shaking better and lasts longer in tough places than a dry gauge.
Accuracy classes tell you how close a reading stays to the real pressure. The PG-09 comes in 2.5%, 1.6%, or 1.0% accuracy. For comparison, CPS Products rates its 2-1/2 inch gauges at Class 1.6 and its 3-1/8 inch gauges at Class 1.0. The PG-09 also has an IP54 or IP65 protection rating. Fieldpiece's professional manifold gauge sets use IP54 for tough field work, so this rating meets real-world needs. The working temperature runs from -40 to +60°C for surrounding conditions.
Dial Scales and Refrigerant Compatibility
The dial decides how fast you can read and understand pressure. The PG-09 uses an aluminum plate in 2.5-inch (63mm) or 4-inch (100mm) sizes. Dual-scale dials show pressure in kg/cm² and PSI, so you skip conversion mistakes. Common pressure units on dual-scale gauges include MPa, bar, psi, and kg/cm². Color-coding splits the blue low-side gauge from the red high-side gauge, which speeds up spotting during service calls.
Refrigerant compatibility decides whether one gauge covers all your work. The PG-09 works with R22, R134, R404, R304a, ammonia, and other low-temperature media. This range covers air conditioning units, refrigerators, and cold chillers. Pressure ranges go from -1+15 kg/cm² to -1+38 kg/cm², which handles both suction and discharge readings on typical systems. A single refrigerant pressure gauge that takes multiple refrigerants cuts down the number of tools you carry. Before you buy any manifold gauge set, check that its seals and materials match the refrigerants you service.
A refrigerant pressure gauge relies on a Bourdon tube to turn pressure into a readable dial value. The low-side and high-side gauges work together to show suction and discharge pressures. This pairing gives you a complete picture of system health. Durable cases, glycerine filling, and multiple accuracy grades—like those in the PG-09 from Changzhou KB Instruments—ensure reliable readings in the field.
Pressure alone cannot confirm a charge. You must interpret readings as saturation temperatures for accurate diagnoses. This deeper understanding helps you identify faults faster. It also supports correct charging procedures. The refrigerant in your system tells a story through these gauges.
Understanding these principles helps HVAC and refrigeration professionals choose the right tool and interpret readings correctly, leading to faster troubleshooting and better system performance.
FAQ
What does a low reading on the blue gauge tell you?
It usually means low suction pressure. You could have restricted airflow, a clogged filter, or a low refrigerant charge. Compare the reading with the superheat value to find the exact cause. A low charge is a common reason.
Can one gauge measure R22, R134a, and R404A?
Yes, if it is made for multiple refrigerants. The PG-09 from Changzhou KB Instruments works with R22, R134, R404, R304a, and ammonia. Always check that the gauge materials match the refrigerant you use. This stops damage to the tool.
Why are some refrigerant gauges filled with glycerine?
Glycerine slows down the needle movement. It stops the needle from shaking or bouncing because of compressor vibration. This makes the reading much easier to see. It also oils the internal moving parts, which cuts down wear over time.
How accurate are standard refrigerant gauges?
Accuracy changes by model. The PG-09 gauge comes in classes of 2.5%, 1.6%, or 1.0%. A lower percentage means a more exact reading. You should pick the accuracy class based on your specific diagnostic needs for the system.
What is the difference between the red and blue gauges on a manifold set?
The blue gauge connects to the low-side suction line. The red gauge connects to the high-side discharge line. The blue gauge shows the evaporation temperature. The red gauge shows the condensing temperature. Together, these gauges give you a full picture of system health.
Hi, I’m Niki, founder of Changzhou Yaobo Instruments & Meters Co., Ltd. and a senior instrumentation R&D engineer with over 20 years of experience in pressure measurement.
I specialize in pressure gauge selection, troubleshooting, and application solutions for demanding industries such as chemical, oil and gas, and metallurgy. Through this blog, I share practical insights from real-world industrial experience to help professionals select reliable instruments and avoid common application issues.




View More(Total0)Comment lists